
A jobs list 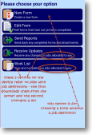
Jobs on the device - downloaded from head office or initiated by user on site |
Welcome to the Jobs menu for magic5. |
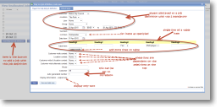
Adding or editing a job 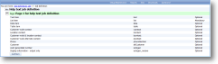
The job definition for this job. |
Unallocated jobs |
The initial view shows any jobs which do not have either a date or a user or group of users. Jobs in this list will not be sent to any devices until they are allocated a date and a user or group (or both). |
|
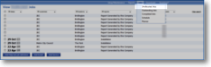
Outstanding jobs |
The initial view shows any jobs which have been given all mandatory fields together with a date and a user and/or group of users. Jobs in this list will be received by allocated users when they sync their device. |
|
Completed jobs |
This list shows jobs that have been completed. |

|
Schedule |
The schedule option shows a consolidated calendar view of both unallocated and outstanding jobs. For more information on this menu item, visit the Schedule help. |

|
Planner |
The planner option shows a consolidated calendar view of both unallocated and outstanding jobs. Days are shown from left to right and operatives vertically. For more information on this menu item, visit the Planner help. |

|
Buttons |
At the bottom of the jobs list are a number of buttons. Some of these open the screen for setting up a new job and will be familiar as the text reads 'Add [name of job definition]'. Others are as follows. |

|
| Import jobs from spreadsheet |
This imports job data from a spreadsheet and requires answers to the following:
For full details see How to Import a job sheet |

|
| Add ... | Click one of these buttons to initiate a job. The buttons refer to job definitions - see job definitions help page to see how to set one up. | |
| Change customer | Select which job needs the customer to be changed using the tick box next to it. Click this button to select a different customer and location. | |
| Change location | Select which job needs the location to be changed using the tick box next to it. Click this button to select a different location from the list attached to this customer. | |
| Close | Select which jobs need to be closed using the tick box next to it and click this button to mark it as closed. | |
| Delete | Select which jobs need to be deleted using the tick box next to it and click this button. A confirmation box will appear after which the job will be permanently deleted. | |
| Export list | This option sends the list of jobs to an Excel spreadsheet. For further information on bespoke formatting please contact magic5 support. | |
| Export data | This option sends data from the selected jobs to an Excel spreadsheet. For further information on bespoke formatting please contact magic5 support. | |
| Custom export | This option sends all selected jobs to a bespoke spreadsheet. See How to Export Job in a List for how to set this up. | |
| Re-allocate | Select which job needs re-allocating using the tick box next to it. Click this button to select a different user from the list. |